Developing applications using only Java, needs to write a lot of code to deal with all the details,
such as preparing databases and others. This makes development complex and time-consuming.
Here comes the spring framework to solve this problem and transforms the development of applications from a complex and long process to a simple one.
It makes you focus on the logic of the application instead of the details of the infrastructure.
With spring, you don't need to write everything manually, it provides you with ready-made templates that help you,
for example, a JDBC template to work with databases without the need to write code
for manage connections and resources, and many others.
Spring boot vs Spring
Spring
Spring is a massive library that helps us build complex and powerful Java applications.
But it requires a lot of manual work to configure everything, whether through XML files or Java
code,
which can take up your time and make things a bit more complicated
Spring Boot
That’s where Spring Boot comes in as a lifesaver! It’s part of Spring,
but its main idea is to simplify everything for you. It handles all the configurations automatically
based on the libraries you’re using, making it super easy to start your project with tools like
Spring Initializr
Spring Initializr
Spring Initializr is an official project generator that simplifies setting up Spring Boot applications
by creating the basic project structure for you, so you don’t have to start from scratch.
It helps you configure your project metadata (e.g., name, version) and build properties,
while also allowing you to select the dependencies you want to include.
Some examples of these dependencies are:
Spring Dev Tools: Provides features like hot reloading to automatically update your running
application when code changes.
Spring MVC: Simplifies the development of server-side web applications.
Spring Data JPA: Offers an abstraction for working with relational databases, making CRUD
operations easier.
Spring Security: Adds authentication and authorization capabilities to your application.
And many more.
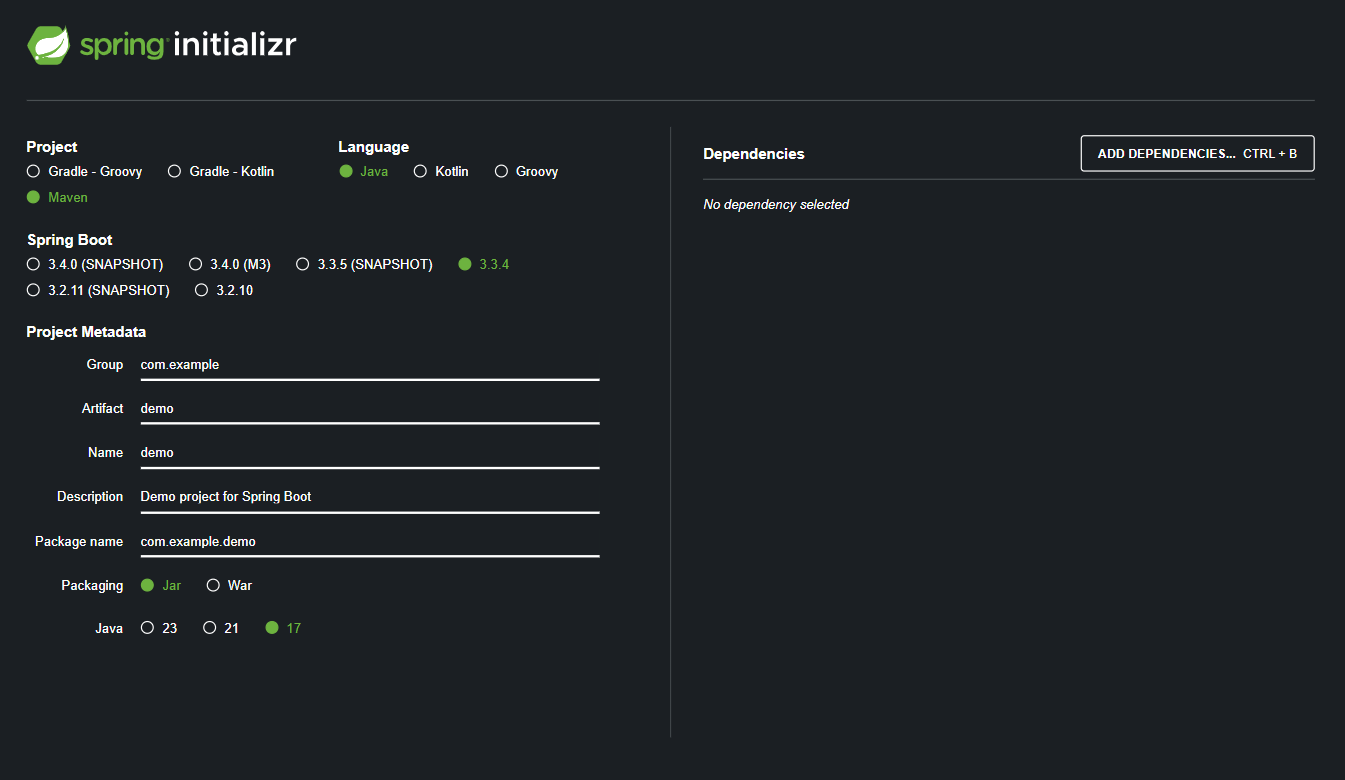
Starting with Spring Initializr
Open the website start.spring.io
Choose Gradle or Maven, Java, and version
Enter project details like Group, Artifact,Name,etc
Add dependencies,Select required libraries
Click “Generate” to download the ZIP file, extract it
Inversion of Control (IoC) in spring boot (and spring) is a design principle where the responsibility
for object creation and lifecycle management is transferred from the developer to the framework.
Traditionally, developers are responsible for creating and managing objects (dependencies) in their code.
With IoC, this responsibility is handed over to the framework, enabling the development
of loosely coupled applications where objects don’t need to know how their dependencies are created.
For example:
Traditional Java Approach
class MessageService {
    public void getMessage(){
        System.out.println("Hello World");
    }
}
public class Main {
    public static void main(String[] args) {
        // Manually creating the object (no IoC)
        MessageService messageService = new MessageService();
        messageService.getMessage();
    }
}
with Spring Boot IoC Container
@Service
class MessageService {
    public void getMessage() {
        System.out.println("Hello World");
    }
}
@SpringBootApplication
public class Main {
    public static void main(String[] args) {
        // Creating the IoC container
        ApplicationContext context = SpringApplication.run(Main.class, args);

        // Retrieving the MessageService bean from the IoC container
        MessageService messageService = context.getBean(MessageService.class);
        messageService.getMessage();
    }
}
Spring Boot uses a set of annotations to define how objects should be handled within the IoC Container.
some the most commonly used annotations:
@SpringBootApplication
Used to configure the application, and it combines three other Spring Boot annotations,
such as @ComponentScan, @Configuration, and @EnableAutoConfiguration
Example
 @SpringBootApplication
public class MyApplication {
    public static void main(String[] args) {
        SpringApplication.run(MyApplication.class, args);
    }
}
@RestController
Used to define a class as a Bean in the web layer, where HTTP requests are handled.
Example
@RestController
public class MessageRestController {
    @GetMapping("/hello")
    public String hello() {
        return "Hello world";
    }
}
@Service
Used to define a class as a Bean in the service layer. It’s a specialized form of @Component
and is typically used to represent a service in the business logic layer.
Example
@Service
class MessageService {
    public void getMessage() {
        System.out.println("Hello World");
    }
}
@Repository
Used to define a class as a Bean in the data access layer.
It helps Spring handle database-related exceptions and interactions.
Example
@Repository
public interface UserRepository extends JpaRepository<User, Long> {
    User findByUsername(String username);
}
@Autowired
Used to automatically inject dependencies (Beans) into objects
when they are created. Spring handles the injection process.
Example
@Service
class MessageService {
    public void getMessage() {
        System.out.println("Hello World");
    }
}
@Controller
public class MessageController {
    @Autowired
    private MessageService messageService; // automatically inject dependencies

    public void displayMessage() {
        System.out.println(messageService.getMessage());
    }
}
Spring MVC and Thymeleaf
Spring MVC and Thymeleaf are technologies used together to build dynamic web applications using Java.
Spring MVC is used to organize web applications, while Thymeleaf is used to display data interactively in
HTML pages.
Together, they provide a flexible way to build modern and maintainable web applications.
What is Spring MVC?
Spring MVC (Model-View-Controller) it's a common software pattern for user interface design.
It separates the application into three distinct but interconnected components:
Model: Represents the data managed by the application (e.g., objects coming from the database).
View: Represents the user interface that the user sees (e.g., HTML, CSS).
Controller: Acts as an intermediary between the Model and View, controlling the application’s
logic.
What is Thymeleaf?
Thymeleaf is a Java-based templating engine that allows you to create dynamic web interfaces
by integrating HTML code with Java data. When used with Spring MVC,
Thymeleaf enables you to display data coming from the Controller.
Thymeleaf provides a simple and intuitive syntax for embedding dynamic content within HTML. Some common
examples include:
th:text: Replaces the text content of an element with dynamic data.
th:href: Dynamically sets the value of a hyperlink.
th:src: Dynamically sets the source of an image or media element.
th:if: Displays or hides elements based on a condition.
th:each: Loops through a list or collection to display multiple items.
th:attr: Dynamically adds or modifies HTML attributes.
th:value: Fills form elements with dynamic values.
th:unless: Displays the element only if the condition is false.
These are just a few examples, and Thymeleaf offers many other attributes to create dynamic,
data-driven web pages with ease.
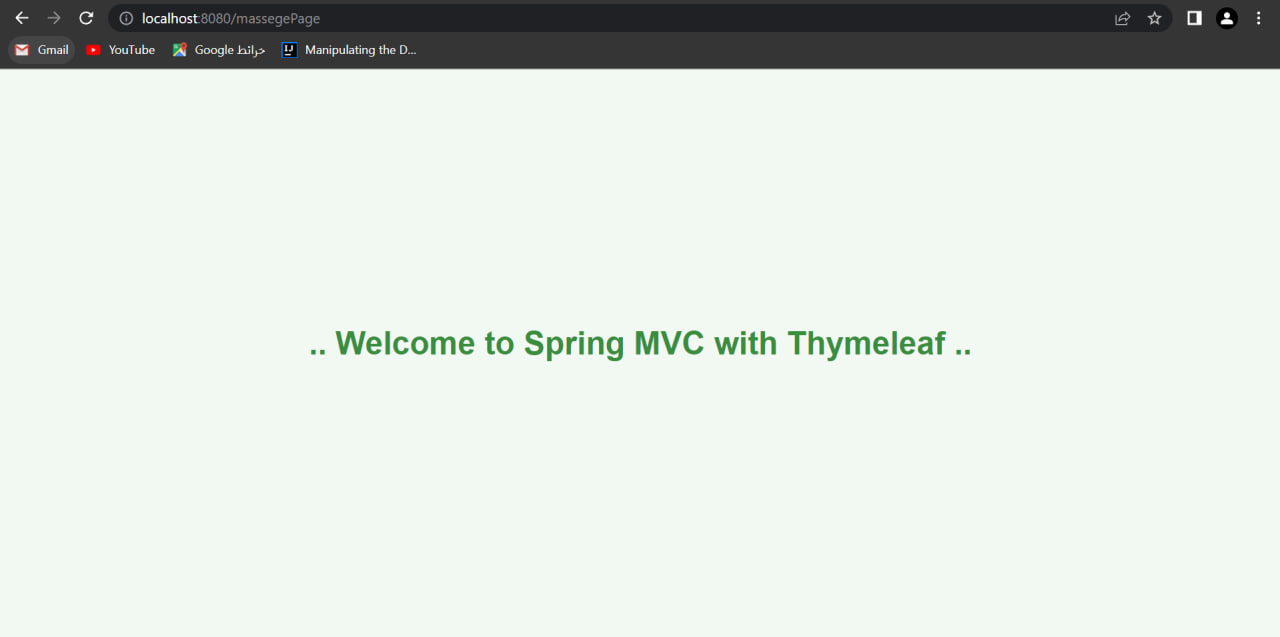
Example of Spring Boot with Thymeleaf:
MassegeController Class
@Controller
public class MassegeController {
    @GetMapping("/massegePage")
    public String home(Model model) {
        model.addAttribute("message", ".. Welcome to Spring MVC with Thymeleaf ..");
        return "massegePage";
    }
}
Main Class
@SpringBootApplication
public class Main {
    public static void main(String[] args) {
        SpringApplication.run(Main.class, args);
    }
}
JPA is a set of guidelines or specifications designed to standardize how data is stored and retrieved from
databases.
It acts as a “rulebook” that defines how object-relational mapping (ORM) should be implemented,
but it doesn’t provide any actual code or implementation. Hibernate, on the other hand,
is a tool that implements these rules, converting Java objects into database tables and vice versa.
Spring Data JPA, part of the Spring Framework, builds on top of JPA and Hibernate to make working with them
easier.
It simplifies data management by reducing repetitive code and providing a straightforward way to handle
operations like adding,
deleting, and updating records without the need for complex queries.
In short, JPA defines the rules, Hibernate implements them, and Spring Data JPA simplifies the process
further.
Example of Spring Data JPA:
User Class
// @Entity annotation defines that a class can be mapped to a table
@Entity
public class User {
    @Id
    private Long id;
    private String name;
    private String email;

    // Getters and Setters
    public Long getId() {
        return id;
    }
    public void setId(Long id) {
        this.id = id;
    }
    public String getName() {
        return name;
    }
    public void setName(String name) {
        this.name = name;
    }
    public String getEmail() {
        return email;
    }
    public void setEmail(String email) {
        this.email = email;
    }
}
UserRepository Class
public interface UserRepository extends JpaRepository<User, Long>{
    // No need to write any code here if you're only using CRUD operations
}
UserService Class
@Service
public class UserService {
    @Autowired
    private UserRepository userRepository;

    public User addUser(User user) {
        return userRepository.save(user);
    }
     public List<User> getAllUsers() {
       return userRepository.findAll();
     }
     public void deleteUser(Long id) {
        userRepository.deleteById(id);
     }
}
Security
Authentication:
Authentication is the process of verifying who someone is. In the digital world,
the most common way to authenticate is by using a username and password.
For example, when you log into a website, you provide your email and password
to prove that you are the person you say you are. Sometimes, you may be required to enter an
additional code (like a One-Time Password or OTP) to further confirm your identity.
There are various methods of authentication, but the core idea remains the same:
ensuring that the user is who they claim to be.
Authorization:
Authorization comes after authentication. While authentication confirms your identity,
authorization determines what you are allowed to do once your identity is verified.
Essentially, authorization defines the permissions or rights you have in the system.
For example, once you’re authenticated as a user, authorization decides whether you can view your personal
data, update it, or perform specific actions.
How Authentication and Authorization Work Together?
While authentication and authorization are distinct concepts, they are closely related.
You cannot authorize a user (i.e., allow them to perform certain actions)
until you have first authenticated their identity. In simple terms, authentication proves who you are,
and authorization determines what you’re allowed to do once you’re logged in.
JWT (JSON Web Token):
JWT, or JSON Web Token, is an open standard (RFC 7519) that defines a compact and secure way
to transmit information between parties as a JSON object.
It’s widely used in RESTful web services for authentication.
Why Use JWT?
Self-contained:A JWT contains all the information needed to verify the user’s identity,
meaning you don’t have to query a database or maintain sessions on the server.
Stateless:In a stateless architecture like REST, the server doesn’t store any session information
about users.
Instead, each request from the client includes a JWT that the server can use to authenticate the user.
Example of using JWT:
Note: In this example, I did not write all the classes,
only those related to the idea of how to implement JWT!
JWTUtil Class
this class will handle the creation and verification of the JWTs
@Component
public class JWTUtil {
// in application.properties file add the following property:
// jwt_secret=REPLACE_THIS_WITH_ANY_THING
    @Value("${jwt_secret}")
    private String secret;

    public String generateToken(String email) throws IllegalArgumentException, JWTCreationException {
        return JWT.create()
                .withSubject("User Details")
                .withClaim("email", email)
                .withIssuedAt(new Date())
                .withIssuer("Example")
                .sign(Algorithm.HMAC256(secret));
    }
    public String validateTokenAndRetrieveSubject(String token)throws JWTVerificationException {
        JWTVerifier verifier = JWT.require(Algorithm.HMAC256(secret))
                .withSubject("User Details")
                .withIssuer("Example")
                .build();
        DecodedJWT jwt = verifier.verify(token);
        return jwt.getClaim("email").asString();
    }
}
JWTFilter Class
This is where your JWT comes into action and makes sure you are authenticated
and can access protected resources that require you to be logged in/authenticated.
There are many types of tests used to validate different features and layers of an application.
I will be talking about two types commonly used for testing Spring applications: unit tests and integration
tests.
Unit tests focus on verifying individual components or methods to ensure they work as expected with given
inputs,
covering both success and failure scenarios. Integration tests, however, validate how multiple components
interact,
often testing complete user flows. As a general rule, unit tests check fixed conditions (invariants),
while integration tests focus on user actions and entire process flows.
In Spring Boot, one of the common tools used for unit testing is JUnit.
JUnit allows developers to write tests for individual methods or components, ensuring they work as expected
in isolation.
It’s simple to use and integrates well with Spring Boot to test specific functionality without involving the
whole application.
You can use annotations like @Test to mark test methods, and with the help of mock objects, you can simulate
dependencies to focus on testing only the unit in question.
Example:
UserService Class
  @Service
  public class UserService{

     public String getUsernameById(Long id) {
         if (id == 1) {
             return "UserX";
         }else{
             return "User not found";
         }
       }
    }
UserServiceTest Class
@Test
     public void testGetUsernameById_ExistingUser() {
         Long userId = 1;

         String result = userService.getUsernameById(userId);

         // Ensures that the expected value equals the actual value.
         assertEquals("user example", result);
     }
For integration testing, Selenium is often used, especially when testing web applications.
Selenium allows you to simulate real user interactions with the application, like clicking buttons, filling
forms, or navigating pages,
to ensure that different components of the system work together as expected.
It’s particularly useful for validating user flows and ensuring the UI behaves correctly in response to
backend processes.
Example
    public static void main(String[] args) throws InterruptedException {
         WebDriverManager.chromedriver().setup();
         WebDriver driver = new ChromeDriver();
         driver.get("http://www.google.com");
         WebElement inputField = driver.findElement(By.name("q"));
         inputField.sendKeys("selenium");
         inputField.submit();
         List < WebElement > results = driver.findElements(By.cssSelector("div.g a"));
         for (WebElement element : results) {
             String link = element.getAttribute("href");
             System.out.println(link);
         }
         Thread.sleep(5000);
         driver.quit();
     }
In this blog, I shared an overview of Spring Boot and some of its key concepts.
It is true that it will give you a basic starting point, but there is a lot to explore within Spring Boot.
As you deepen, you'll know more powerful features that will help you build scalable and efficient apps.